
Case Study - Modelling History
The Making of a 3D Printed Scale Model of the Roman Arch of Cáparra
Due to interest in this project, the stages involved in its implementation have been detailed below. The following description gives a good general overview of our 3D modelling and printing workflow.

Stage 1 Reference Material
Reference photos were taken of the monument to document its important features.
Detailed CAD plans of the monument in its current state were provided to us. These plans were imported into Illustrator for clean up – the removal of duplicate lines and other superfluous details. Contrasting the plans with the reference photos, any visible errors were removed.
The cleaned up plans were then exported for use as reference (curve) information in the 3D modelling package.

Stage 2 3D Modelling
After importing the plans for use as reference curves in the 3D modelling software (Maya), the monument was painstakingly modelled using NURBs – basically 3D modelling using curves as opposed to polygons. Due to the complex geometry of the monument, the modelling process took about a month to complete.
Stage 3 Preparing for Print
The 3D model was exported as an .STL mesh and any problems were corrected and the mesh simplified. The mesh was strategically divided to maximize the size of each printed component whilst minimizing the support material needed.
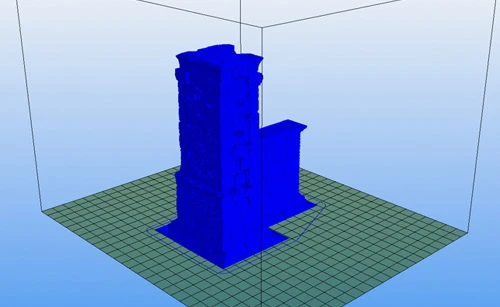
Stage 4 3D Printing
Each individual component was imported into the 3D printer software (Repetier) and then sliced into thin horizontal layers using slicing software (Slic3r). This layer information was exported as GCODE – the language that the 3D printer can understand. The component was then printed using white ABS filament. After printing, any sharp or rough edges were removed using hand tools. It took approximately 80 hours to print all the parts of the monument.

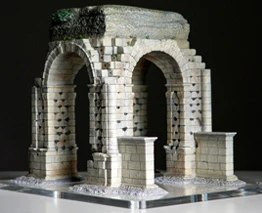
Stage 5 Post Production
Each printed part was joined together using ABS cement (a mixture of ABS and acetone). The assembled model was again cleaned up to remove any defects or join marks. The model was then sprayed with primer and prepared for paint. A base coat of grey was laid down before painting with acrylics using an airbrush. Smaller details were hand painted with a brush.
To finish, the model was mounted on a Perspex base plate and final details such as vegetation and gravel were added.
From start to finish, the model took just under 2 months to build!
Visit our 3D printing and model making section for more information about services provided.


